How to film a soccer match on iPhone
The camera stays on the pitch the whole match, and only the moments are kept. Minus5 remembers the last seconds of play: tap GOAL after the goal, and the clip starts 10 seconds before your tap. Afterwards, the clips go into one video with the teams, the score and the match time.

Before the match
Create the match in advance
In the gallery tap New project → Match without picking anything, and fill in the teams, their kit colors and the name of the match or league. After the game, all that's left is to tick the clips and tap Add to project. The video is ready sooner, and the whole team is waiting for it.
Lock the orientation
Filming is easier when the screen doesn't turn with every tilt of the phone. Before the match, turn it with the rotate button at the top of the camera screen, and turn it back after the game. Check that the buttons sit level: if the phone is sideways and the screen stayed upright, the video comes out on its side. Film all the match's clips in one orientation: clips in different ones won't join into one video.
60 frames per second
Settings → Video → Frame rate: 60 fps. Football is fast, and at 60 frames the ball and the players move more smoothly, especially in a slow-motion replay.
Buttons within reach
Try the buttons before kick-off. Settings → Interface → Event buttons has Row and Column, set separately for filming upright and sideways. It's often handy to hold the phone in one hand and tap events with the same hand.
Mark the whistle
The match time on the video counts from the whistle. Mark the start and end of each half with any event button, then untick that clip: it stays out of the video, and the match time still follows it. Turning on the WHISTLE button in Settings → Event buttons is handier still: those clips make it easy to find your way around the match later.
Battery and storage
90 minutes use about half the battery: the camera screen stays on and the camera runs the whole time. Storage is no worry: the pre-record takes about 20 MB and writes over itself, and 30 clips of 15 seconds come to about 300 MB.
Where to stand
Higher up and near the halfway line: from there you see both halves of the pitch. Keep the sun behind you or to the side, or the players turn into dark shapes. A tripod or monopod saves your arms; filming by hand, turn on Settings → Video → Stabilization.
Step by step
Step 1
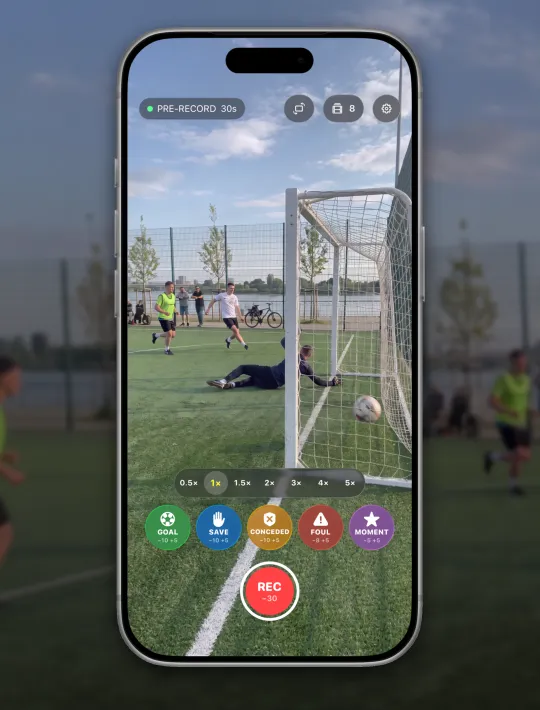
Keep the action in frame
The camera always remembers the last 30 seconds of play. Older footage wipes itself, so storage never fills up.
Keep the ball and the players around it in frame. With a lot of zoom the ball is easy to lose on a long pass. The screen doesn't go dark while the camera is open.
Step 2
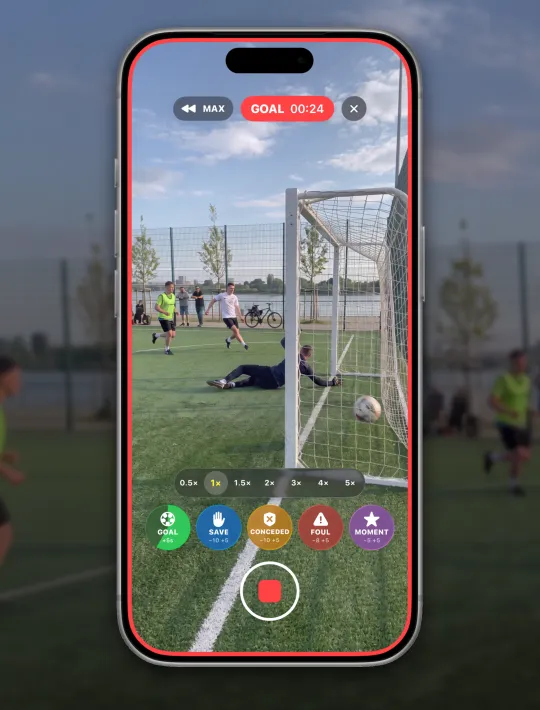
Scored? Tap GOAL
A save, a foul or just a great moment: each has its own button. The clip is labeled at once, and the camera keeps filming.
Tap once the goal is in: GOAL takes 10 seconds before the tap and 5 after. Tapped late? While the clip records, tap MAX at the top and it starts from the oldest second the pre-record still has. A save and a goal ten seconds apart: tap both, and both clips are kept in full.
Step 3
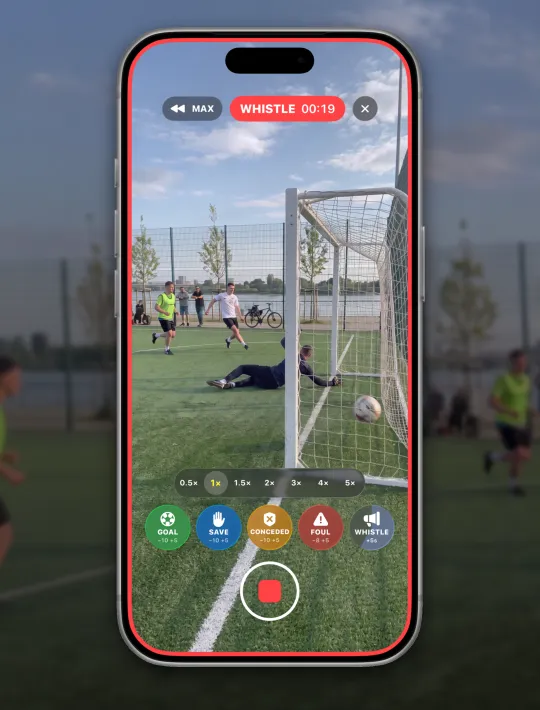
Don't miss the whistle
Tap WHISTLE when the referee starts and ends the match. These clips tell the project the match time.
Without a WHISTLE button, any button will do: mark the whistle with it, then untick the clip. The match time still follows it.
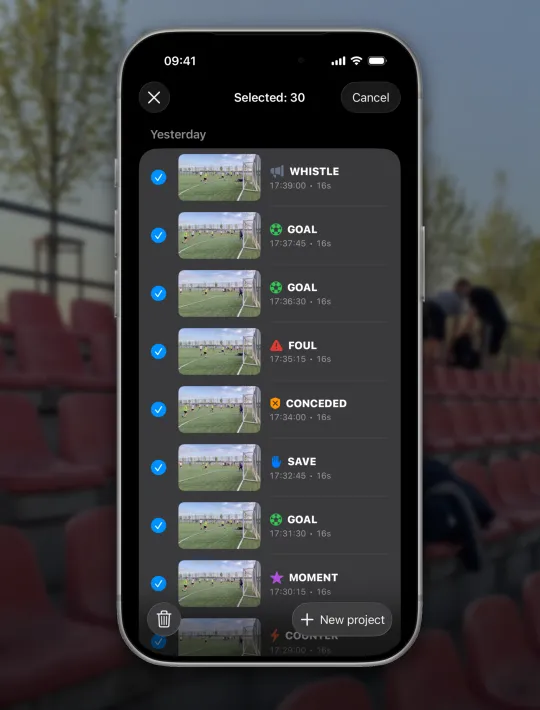
Step 4
Pick the match's clips
In the gallery tap Select, tick the clips, then New project and pick Match.
Created the match in advance? Tick the clips and tap Add to project. A clip you forgot gets added the same way.
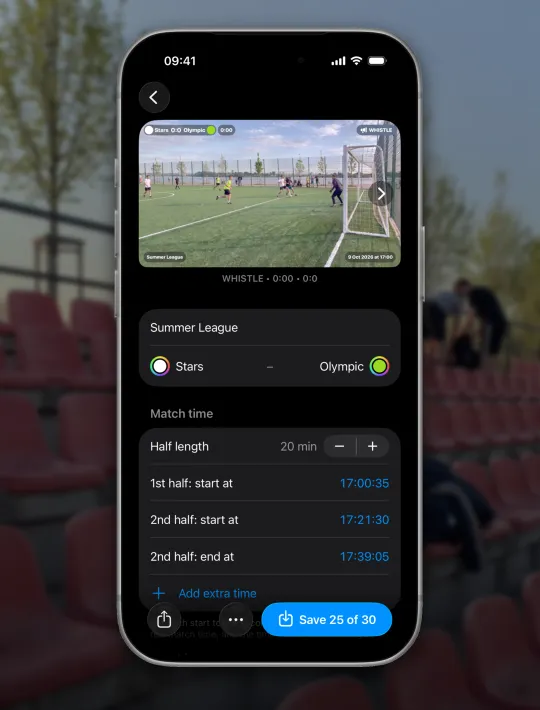
Step 5
Name the teams
The league, the teams and the color of their kit, as the scoreboard will show them.
If you created the match in advance, it's all filled in already.
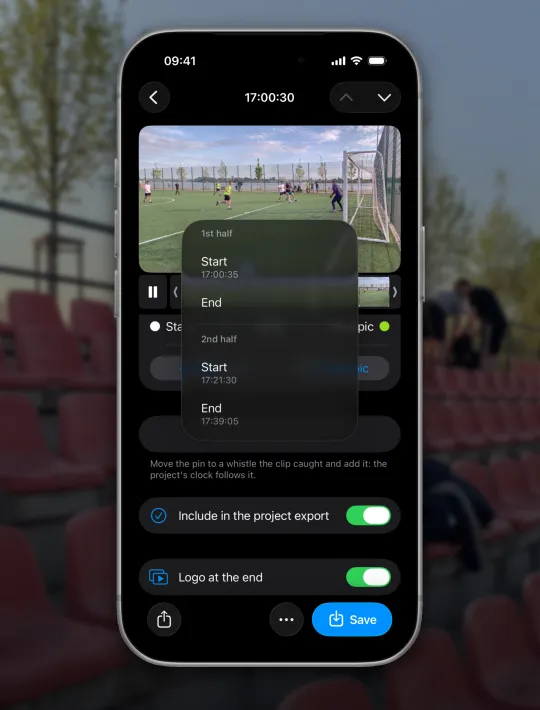
Step 6
Mark when each half starts and ends
In any clip, move the pin onto the whistle, tap Add a whistle and pick what it was. The match clock follows it.
The whistle didn't make it into a clip? Set the start yourself: in the project, 1st half: start at → Set, to the second. Added time shows as +1:23 past the length of the half.
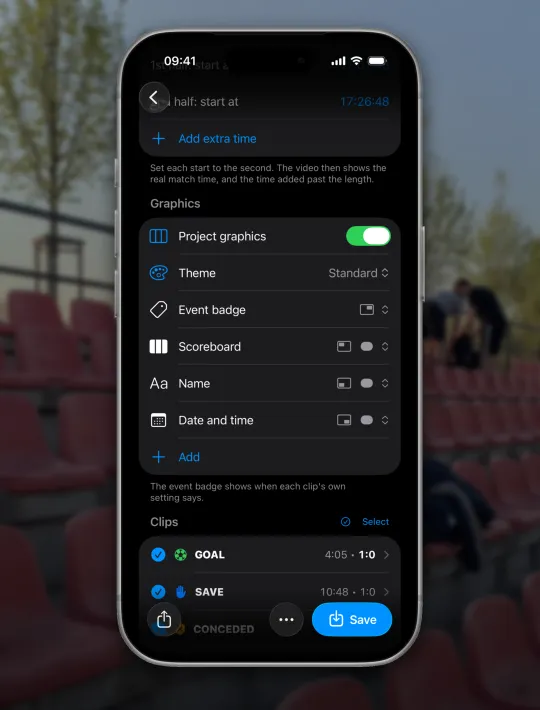
Step 7
Pick the graphics
Scoreboard, match time, name and date. Put each block where you want it.
Tap a block to pick its place and when it shows. One clip saves with the graphics for free; several clips in one video take Pro.
Step 8
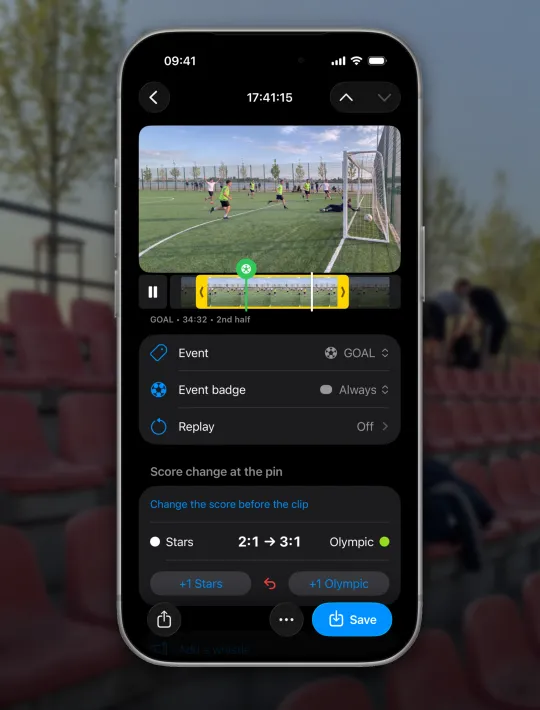
Trim the clip, set the score
Drag the clip's edges to keep the best part and tap +1 on a goal. The score carries on to the clips after it.
To bring the moment closer, pinch the video: crop up to 3×, and the cross next to the zoom figure brings the whole frame back. A goal with no clip, or you started filming mid-match: in the clip after it, set Score before the clip, and the clips after count on from there.
Step 9
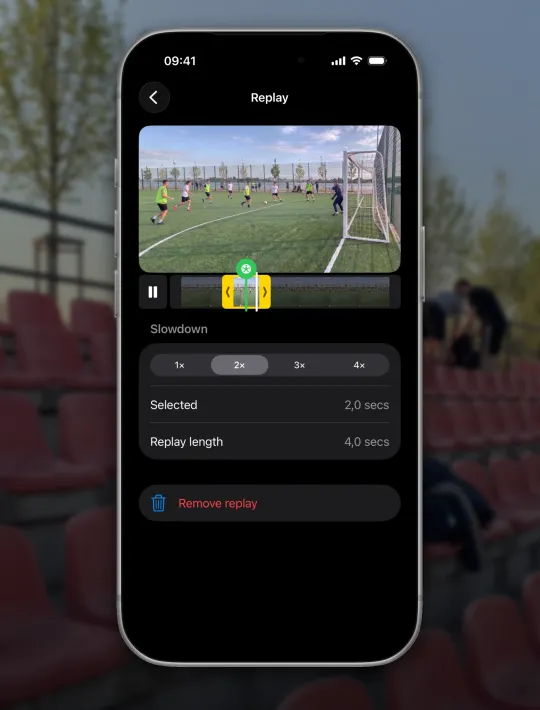
Replay and the event
Play the best moment again right after the clip, up to 4× slower. Wrong event type? Change it right there.
A replay takes the clip's crop, and you can give it its own: pinch the video on the replay screen. Viewers drop off long replays; a couple of seconds around the moment is usually enough.
Step 10
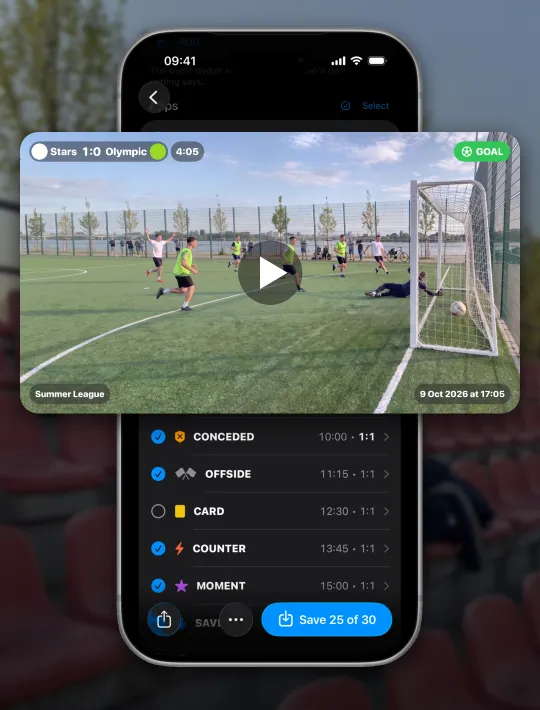
Save the best
Untick the clips you don't need and tap Save. The video with the scoreboard, score and replays is saved to Photos.
You can save only the goals, only the saves or any other event: in the project, above its clips, Select → Only GOAL. The button then reads Save 3 of 12. Two or more clips in one video take Pro.
Questions
Will my phone last a whole match?
Yes. 90 minutes use about half the battery. The phone may get a little warm, and that's normal: the Camera app would do the same.
What's free and what takes Pro?
The camera, the event buttons, the clips, trimming, replays and one clip with graphics are free. Pro saves two or more clips as one video and turns off the logo at the end.
How do I trim, split or rotate a clip?
To trim, drag the handles at the ends of the frames under the video: what's trimmed is only hidden, and the edges come back any time. To split, put the playhead where the cut should be and tap ⋯ at the bottom of the screen → Split clip, and each part gets its own event. The same menu rotates a clip: ⋯ → Rotate right or Rotate left. That helps when the match was filmed sideways, the camera screen stayed upright, and the video came out on its side.
How do I change the event or fix the graphics?
The event changes under Event on the clip's screen: pick another or remove it. The event's name on the video goes off with Event badge → Off, and the same menu sets when it shows. Swipe a graphics block left to delete it, or tap it and pick Place to move it.
How do I save only the goals or leave a clip out of the video?
In the project, above its clips: Select → Only GOAL. Saves, fouls and any other event from the match are picked the same way. The other clips stay in the project unticked and stay out of the video. To take a clip out of the project altogether, swipe it left in the list → Take out of the project; it stays in the gallery.
I started filming after kick-off. How do I set the score?
In the project's first clip, set Score before the clip. The score counts on from it.
How do I save without sound or without the logo at the end?
Sound goes off under ⋯ → Sound. The logo at the end has its own Logo at the end switch, and only Pro turns it off.
How do I send the video to the team chat?
Save puts the video in Photos, and from there it goes to any messenger. The share button next to Save sends it straight away.
How do I delete a clip or free up space?
A clip goes with ⋯ → Delete clip, several at once with Select in the gallery and Delete. Videos already saved to Photos stay. More room comes from ⋯ → Delete trimmed parts in a clip, or More → Delete trimmed parts in a project, for every clip at once. What's deleted can't be brought back.
How do I change a project's kind or delete it?
In the project, ⋯ → Kind: match, sparring, ride or collection. The same menu has Delete project, and the clips stay in the gallery.